Category Archives: Product

3. Add User

3. Add User
5-22-2014 2-49-34 PM 
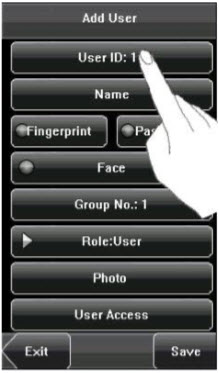
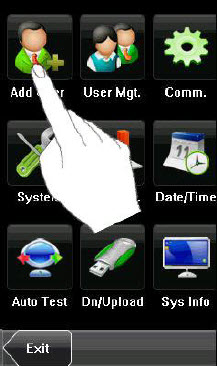
Press [Add] on the [User Mgt.] interface to display the [Add User] interface as shown below.
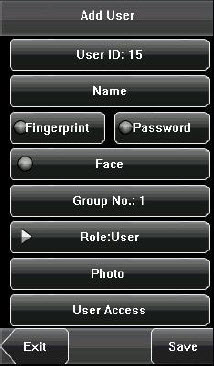
5-22-2014 2-52-12 PMUser ID: Enter a user ID. 1 to 9 digits user IDs are supported by default.
Name: Enter a user name. 12 characters user names are supported by default.
Fingerprint: Enroll a user’s fingerprint and the device displays the number of enrolled fingerprints. A user can enroll 10 fingerprints at maximum.
Password: Enroll a user’s password. The device supports 18 digit passwords by default.
Face: Enroll a user’s face.
Group No.: Set the group that the user belongs to. Valid group No.: 1-24.
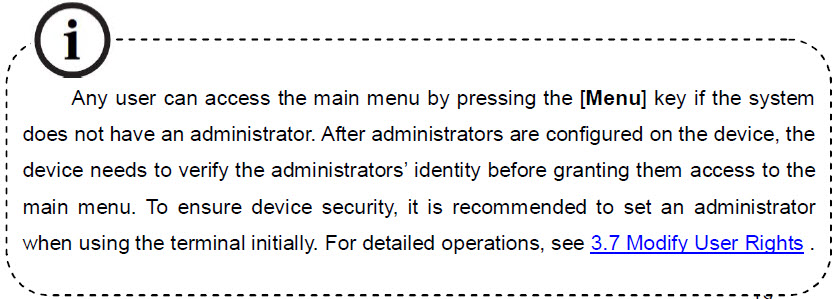
Role: Set the rights of a user. A user is set to ordinary user by default and can also be set to administrator. Ordinary users are only granted the rights of face, fingerprint or password verification, while administrators are granted access to the main menu for various operations apart from having all the privileges granted to ordinary users.
Photo: Enroll a user’s photo. During user verification, the user’s photo is displayed on screen.
User Access: Set the lock control and access control parameters.

ย้อนกลับ กลับสู่เมนูหลัก ถัดไป


3.1 Entering a User ID 

The  device  automatically  allocates  an  ID  starting from 1 for every user in sequence. If you use the ID allocated by the device, you may skip this section.
1.  Press  [User ID]  on the  [Add  User]  interface  to display the user ID management interface.

2014-05-22 14-52-10

 Tip:  The  user  ID  can  be  modified  during  initial enrollment, but once enrolled, it cannot be modified. 

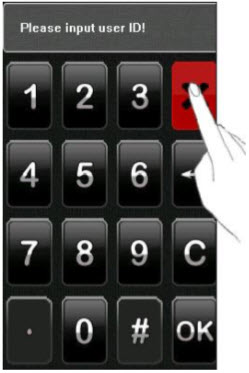
2. On the displayed keyboard interface, enter a user ID and press [OK]. If the message “The user ID already exists!” is displayed, enter another ID.

Tip: The device supports 1 to 9 digits user IDs by default. If you need to extend the length of current user ID numbers, please consult our commercial  representatives  or  technical pre­sales. 

2014-05-22 14-52-36


3. After the user ID is entered, press [Save] to save the current information  and  return to  the previous interface.  Press  [Exit]  to  return  to  the  previous interface without saving the current information.

ย้อนกลับ กลับสู่เมนูหลัก ถัดไป

2. Main Menu

2. Main Menu

There are two types of rights respectively granted to two types of users: the Ordinary users and administrators. Ordinary users are only granted the rights of face, fingerprint, password or card verification, while administrators are granted access to the main menu for various operations apart from having all the privileges granted to ordinary users.

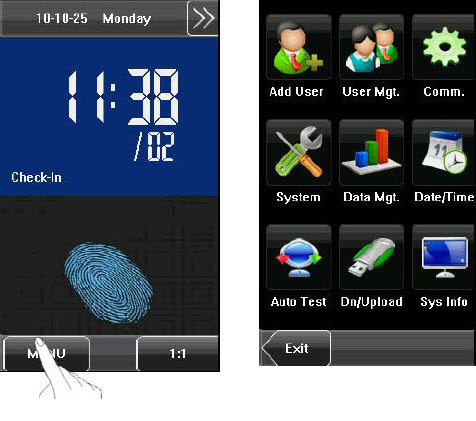
Press [Menu] on the initial interface to access the main menu, as shown in the following figure:
5-22-2014 2-22-12 PMThe main menu includes nine sub menus:
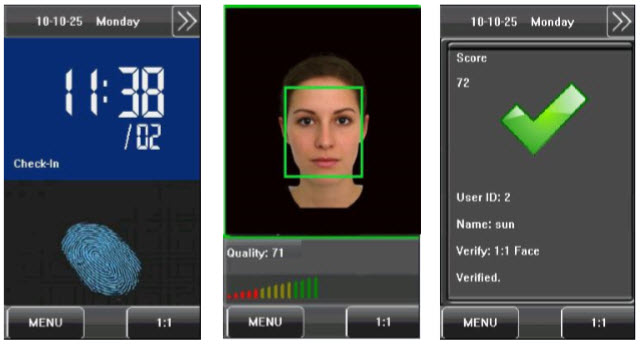
Add User: Through this submenu, you can add a new user and input the information on the device, including the user ID, name, fingerprint, face, card, password, rights, group No. and user access.
User Mgt.: Through this submenu, you can browse the user information stored on the device, including the user ID, name, fingerprint, face, card, password, rights, group No. and user access. Here you can also add, modify or delete a user’s information.
Comm.: Through this submenu, you can set related parameters for communication between the device and PC, including the IP address, gateway, subnet mask, baud rate, device No. and communication password.
System: Through this submenu, you can set systemrelated parameters, including the basic parameters, interface parameters, fingerprint, face and attendance parameters, Keyboard definitions, Access settings, firmware update etc. to enable the device to meet the user’s requirements to the greatest extent in terms of functionality and display.
Data Mgt.: Through this submenu, you can perform management of data stored on the device, for example, deleting the attendance records, all data, clear administrator, restore to factory settings and query records.
Date/Time: Through this submenu, you can set the alarm time and duration, or set the Bell.
Auto Test: This submenu enables the system to automatically test whether functions of various modules are normal, including the screen, sensor, voice, face, keyboard, clock tests and screen calibration.
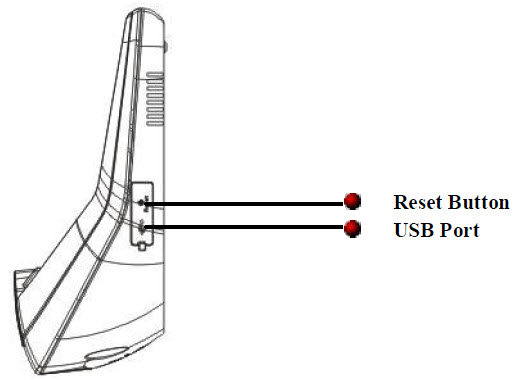
Dn/Upload: Through this submenu, you can download user information and attendance data stored in the device through a USB disk to related software or other fingerprint recognition equipment.
Sys Info.: Through this submenu, you can browse the records and device information.

5-22-2014 2-22-44 PM


ย้อนกลับ กลับสู่เมนูหลัก ถัดไป

1.8.5 Combination Verification

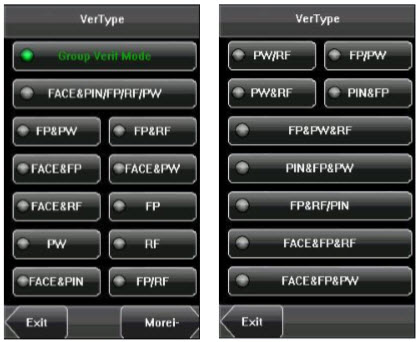
The  device  supports  up  to  20  verification  modes,  including  FACE&PIN/FP/RF/PW 、 FP&PW 、 FP&RF 、 FACE&FP 、 FACE&PW 、  FACE&RF、FP、PW、RF、FACE&PIN、FP/RF、PW/RF、FP/PW、PW&RF、  PIN&FP 、 FP&PW&RF 、 PIN&FP&PW 、 FP&RF/PIN 、 FACE&FP&RF 、 FACE&FP&PW  etc.  For  the  detail,  please  refer  to  Appendix  4 Multi­combination Authentication Mode.

 Note: RF means ID card verification. Only the products with the built­in
ID card module support the ID card verification.

2014-05-22 14-25-27

Here is the combination verification operation; we will use the FACE&FP verification for an example.
If you verify the fingerprint first and then the face, the operations are as follows.
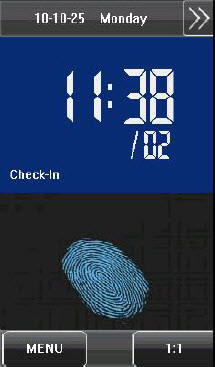
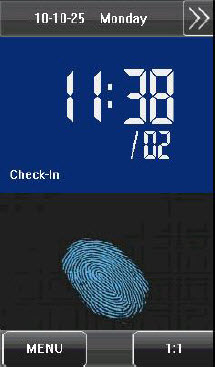
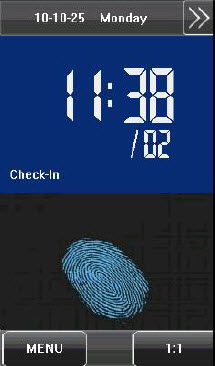
(1) The default main interface is the fingerprint verification mode, see the figure below.
(2) Press your finger on the fingerprint sensor by adopting the proper fingerplacement. For details, see 1.3 Finger Placement. 
(3)  If  the  verification  is  successful,  the  device  will  enter  the  1:1  face recognition mode.  Compare the face in  a proper  way.  For details,  see 1.1 Standing Position, Posture and Face Expression. 
(4)  If  the  verification  is  successful,  the  device  will  prompt  “Verified”.  The system will return to the main interface if the verification is not passed within 20 seconds.

2014-05-22 14-24-51


Otherwise, the FACE&FP combination verification can perform such as FACE (1: N) + FP, PIN + FACE (1:1) + FP, PIN + FP (1:1) + FACE etc. The operation is similar to the procedure introduced before.

ย้อนกลับ กลับสู่เมนูหลัก ถัดไป

1.8.4 ID Card Verification ★

1.8.4 ID Card Verification ★
5-22-2014 1-25-17 PMNote:
Only the products with the builtin ID card module support the ID card verification.
In the fingerprint verification mode, the device compares current ID card collected by the Card Reader with all the ID card data on the device.
5-22-2014 1-58-47 PM 1. Swipe your ID card on the card swipe area by adopting the proper way. For the card swipe area, see 1.6 Appearance of Device.
2. If the verification is successful, the device will prompt “Verified”.
3. If the verification is not successful, the device will prompt “Not Enrolled”.
5-22-2014 2-19-58 PM


ย้อนกลับ กลับสู่เมนูหลัก ถัดไป

1.8.3 Password Verification 

In  the  password  verification  mode,  the  device compares the password entered with that in relation to the user ID.

1
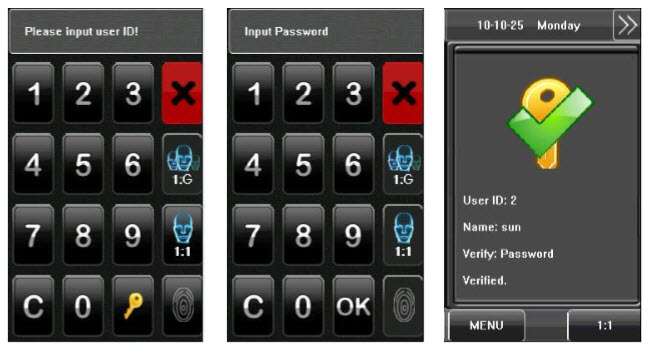
1. Press [1:1] on the screen or [1:1] button to enter the password verification mode.
2. Enter the user ID and then press the “Key” icon to enter the password verification mode. If the prompt “Unregistered user!” is displayed, the user ID does not exist.
3. Enter the password and press the “OK” icon to start the password comparison.
4. If the verification is successful, the device will prompt “Verified”, otherwise the device will prompt “Verify fail” and return to password input interface.

2014-05-22 14-12-16


ย้อนกลับ กลับสู่เมนูหลัก ถัดไป

1.8.2 Face Verification 

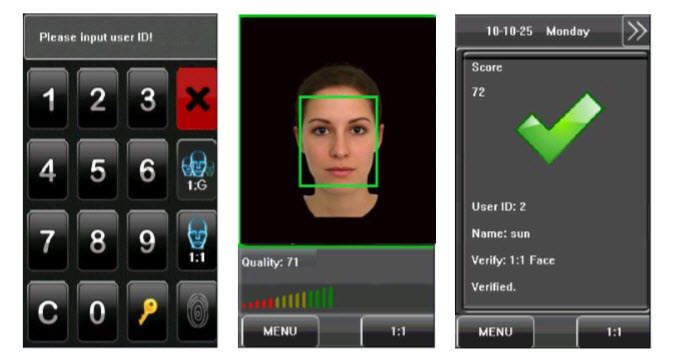
1:1 face verification 
In  the  1:1  face  verification  mode,  the  device compares  current  face  collected  through  the camera with that in relation to the user ID entered through the keyboard. Adopt this mode only when it is difficult to recognize the face.

5-22-2014 1-58-47 PM
1. Press [1:1] on the screen or [1:1] button to enter the 1:1 recognition mode.
2. Enter user ID and then press the “1:1 Face” icon to  enter  1:1  face recognition mode. If the  prompt “Unregistered user!” is displayed, the user ID does not exist.
3. Compare the face in a proper way. For details, see 1.1 Standing Position, Posture and Face Expression.
4.  If  the  verification  is  successful,  the  device  will  prompt  “Verified”.  The system will return to the main interface if the verification is not passed within 20 seconds.

2014-05-22 14-01-18


ย้อนกลับ กลับสู่เมนูหลัก ถัดไป

1.8.1 Fingerprint Verification

1.8.1 Fingerprint Verification

1. 1: N fingerprint verification
In this fingerprint verification mode, the device compares current fingerprint collected by the fingerprint sensor with all fingerprint data on the device.
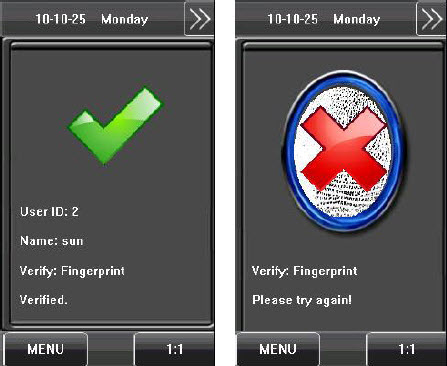
5-22-2014 1-58-47 PM 1. The default main interface is the fingerprint verification mode. See the figure on the right.
2. Press your finger on the fingerprint sensor by adopting the proper finger placement. For details, see 1.3 Finger Placement.
3. If the verification is successful, the device will prompt “Verified”.
4. If the verification is not successful, the device will prompt “Please try again”.
5-22-2014 1-59-17 PM
 2. 1:1 fingerprint verification
In the 1:1 fingerprint verification mode, the device compares current fingerprint collected through the fingerprint sensor with that in relation to the user ID entered through the keyboard. Adopt this mode only when it is difficult to recognize the fingerprint.
5-22-2014 2-00-04 PM1. Press [1:1] on the screen or [1:1] button to enter the 1:1 fingerprint recognition mode.
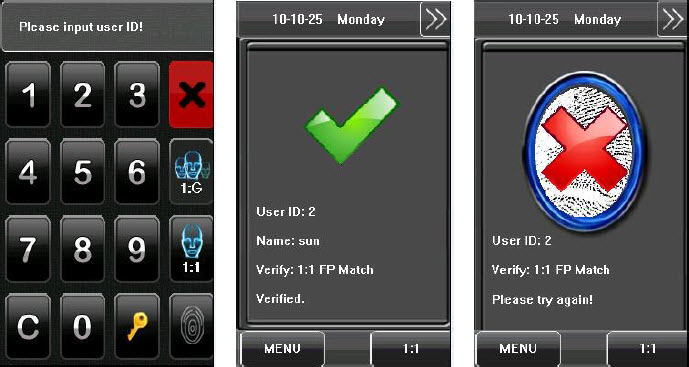
2. Enter user ID and then press the “Fingerprint” icon to enter the 1:1 fingerprint recognition mode. If the prompt “Unregistered user!” is displayed, the user ID does not exist.
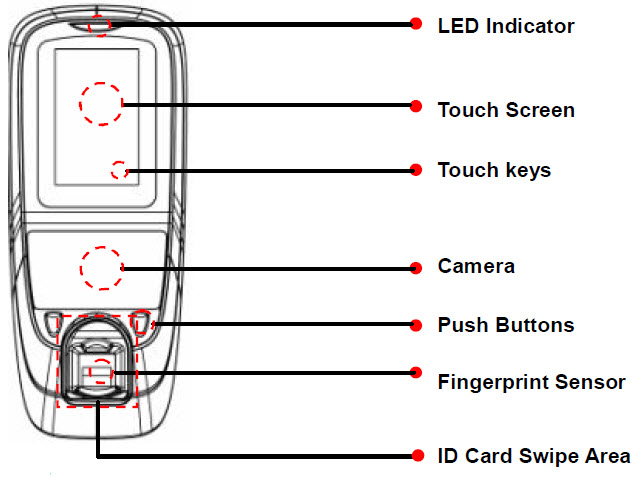
3. Press your finger on the fingerprint sensor by adopting the proper finger placement. For details, see 1.3 Finger Placement.
4. If the verification is successful, the device will prompt “Verified”, otherwise the device will prompt “Please try again”.
5-22-2014 2-00-26 PM

ย้อนกลับ กลับสู่เมนูหลัก ถัดไป


1.7 Main Interface 

2014-05-22 13-52-40

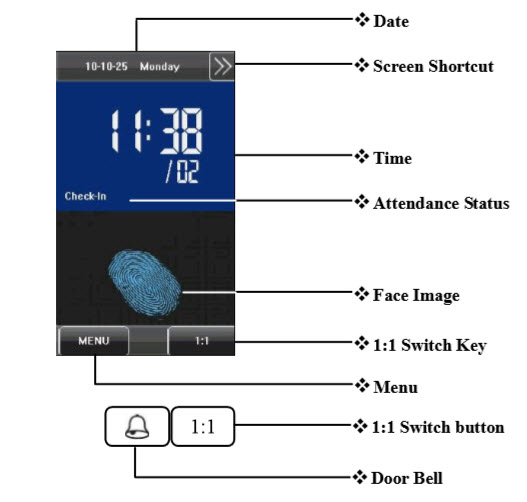
 Date: The current date is displayed.
② Screen  Shortcut  Keys:  Press  these  shortcut  keys  to  display  the attendance status. Users can customize the function of each shortcut key. For details, see 6.6 Keyboard Definitions.  
③  Time:  The  current  time  is  displayed.  Both  12­hour  and  24­hour  time systems are supported.
④ Attendance Status: The current attendance status is displayed. ⑤ Fingerprint Image: When the fingerprint image is displayed, the device is  currently in the fingerprint recognition mode.
 1:1 Switch Key: By pressing this key, you can switch to the 1:1 verification  modes, and enter the digital input interface. The function is same to ⑨[1:1]  Switch Button.
⑦ Menu: You can enter the main menu by pressing this key.  ⑧ Door Bell: For visitors to ring the bell and ask for help to open the door.  ⑨ 1:1 Switch Button: By pressing this button, you can enter the digital input  interface of the 1:1 verification mode.

ย้อนกลับ กลับสู่เมนูหลัก ถัดไป