When the PC is connected to an 8inch colorscreen device, set the server on the 8inch colorscreen device and connect the 8inch colorscreen device to the Internet. Start the attendance management software on the PC, and the software automatically detects the device and downloads the photos taken on the device. The detailed operation is as follows:
1. Connect the PC and the device to the Internet respectively, or ensure that both of them are in the same LAN.
2. Choose Menu > Communication device > Other settings on the device. Set the Web server to the IP address of the server where the photos will be saved.
3. Open the attendance records on the device (Note: The device must be configured to take photo of and save the attendance records) and take photo of the attendance records.
4. Start the attendance management software, choose Maintenance/Options>System Options, and select Display Photo in the Regular pagination.
5.Select Transaction Photo Record of using Http in the Extend Function pagination. Ensure that the port settings are consistent with Web port settings on the device. Finally, click “OK” button to save, as shown in the following figure.
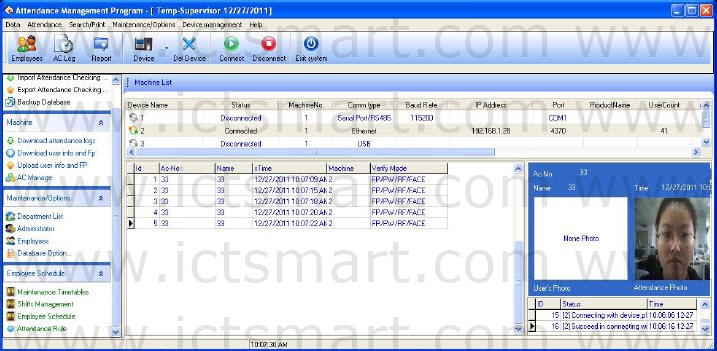
6.The attendance management software automatically detects the online device, and displays the latest attendance records and photos in the main interface, as shown in the following figure.
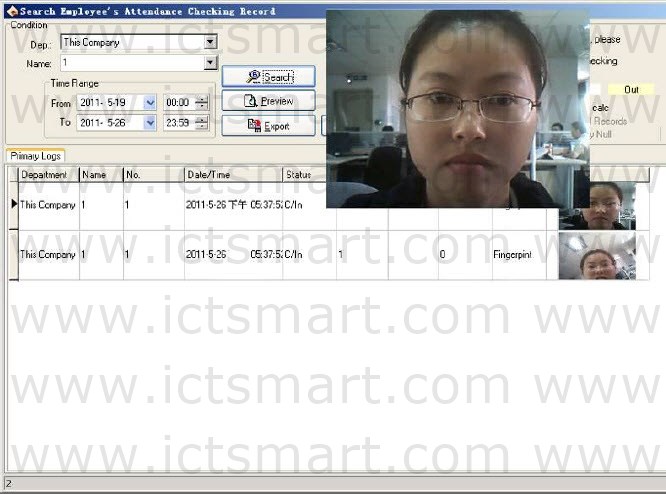
7.You can also query the latest records and photos from the attendance records: 1) Connect the device first, 2) Download the attendance records, 3) Open the attendance records, 4) Finally select Display the images photographed by the device. Then, you can see the details of each record, including the images. In the image list, you can click an image to view the enlarged image.
| ย้อนกลับ | กลับสู่เมนูหลัก | ถัดไป |


